A poorly planned security light can be worse than no light at all: it can glare into a neighbour's bedroom, trigger every time a car passes, leave the actual entrance in shadow, or expose weaknesses in old outdoor wiring. The fitting may be inexpensive, but a safe, useful installation depends on the assessment behind it.
Use this security light installation electrician checklist to brief a professional, compare quotes properly, and make sure the finished light does the job you need without becoming a nuisance.
Start with the right electrician and a clear installation brief
New outdoor wiring, changes to a circuit, fault finding, and replacement work where the existing supply is questionable all call for a qualified electrician. Do not assume that swapping a light fitting is automatically simple, especially if cables, connections, earthing, or protective devices need attention.
- Confirm relevant electrical competence. Ask whether the electrician carries out outdoor lighting work and can inspect, test, and certify the completed installation where applicable. A security light is exposed to weather and mechanical damage, so the electrical work behind the fitting matters as much as the fitting itself.
- Check insurance and agree a written scope. The quote should state what is being installed, where it will be mounted, how power will be supplied, and what is included. This prevents a vague "fit customer-supplied light" price from becoming a dispute over cabling, access, or repairs to finishes.
- Ask whether notification or certification is relevant. Requirements can depend on the nature and location of the work. Your electrician should explain what testing and documentation apply to your particular installation.
- Request an assessment before accepting a quote. The electrician should consider the existing outdoor circuit, consumer unit capacity, cable route, mounting surface, and the area you want illuminated. This is particularly important where an old light has failed, as replacing it without identifying the cause can repeat the problem.
Details to give when requesting a quote
A useful enquiry saves time and produces a more realistic quote. Give the property type, the number of lights you want, and clear photos of each proposed location taken from both nearby and further back.
- Describe the area and your goal. Say whether the light is for a front door, driveway, side passage, rear gate, garage, or route to an outbuilding. Mention whether you need safe access, a deterrent, or better visibility for a camera.
- Show the existing setup. Include photos of current lights, switches, external cables, the consumer unit if relevant, and the likely cable route. Note whether the existing light works, trips a circuit, flickers, or has visible water damage.
- State how you want it controlled. Tell the electrician whether you want PIR motion sensing, dusk-to-dawn operation, a timer, a manual switch, or an override function. These decisions affect both fitting choice and wiring requirements.
- Flag access constraints. Gates, conservatories, uneven ground, high eaves, finished internal walls, and restricted side passages can all change the labour involved. Be upfront rather than expecting an installer to discover these issues on arrival.
A site visit may still be necessary when cable routes, earthing arrangements, supply capacity, or the condition of existing external wiring cannot be confirmed from photographs.
Define what the security light needs to achieve
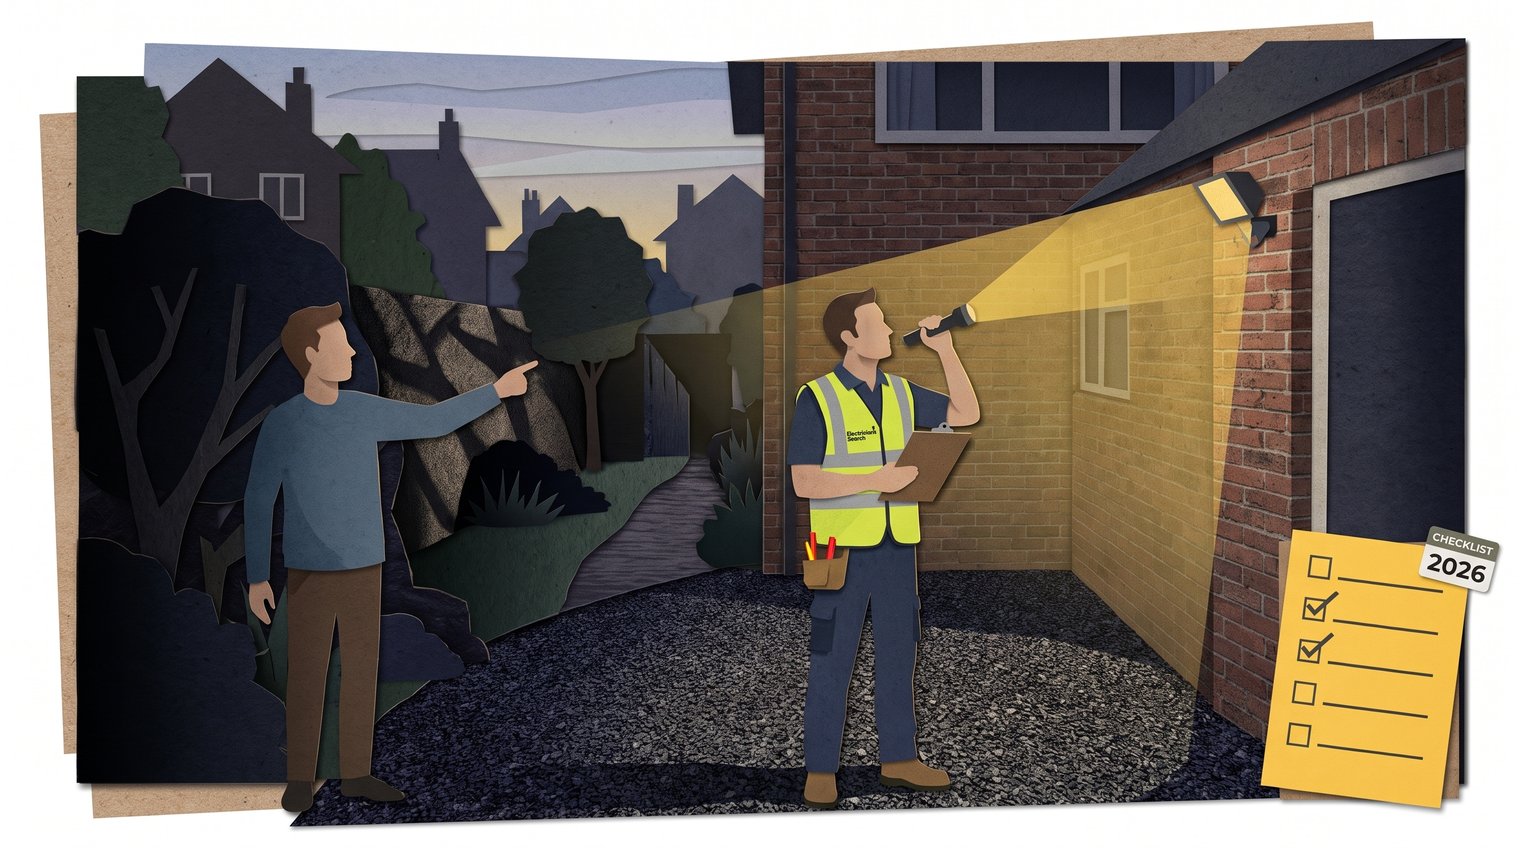
Start with the problem area, not the brightest product on the shelf. A light intended to make a front step safer needs a different output, direction, and operating pattern from one covering a long driveway or rear access route.
- Mark the area that genuinely needs light. Identify the front door, driveway, side passage, rear access, garage, shed, gate, or outbuilding route. Be specific about where someone needs to see obstacles, locks, paths, or approaching visitors.
- Separate deterrence from safe access. Security lighting does not need to turn a garden into a floodlit yard. For safe access, a controlled low-glare light may be more useful than a powerful motion floodlight that leaves you temporarily dazzled.
- Consider CCTV support carefully. If a camera is part of the plan, tell the electrician where it is and what it needs to capture. Light aimed directly toward a camera can create glare or wash out faces, while light placed beside the camera may improve usable night footage.
- Account for the surroundings. Look beyond your boundary at neighbours' windows, bedrooms, roads, public footpaths, and wildlife-sensitive areas. The best design puts light only where it serves a purpose.
Choose the operating method before choosing the fitting
PIR motion sensors are popular because the light only runs when movement is detected, but they are not automatically the right answer. A side passage used often by pets, or a driveway beside a busy pavement, may need carefully restricted detection or a different control method.
- Use PIR sensing for occasional movement. This can work well at doors, gates, and quieter driveways, provided the sensor is aimed at the intended approach route rather than general activity nearby.
- Use dusk-to-dawn control for consistent low-level lighting. A photocell turns the light on as daylight falls and off when it returns. It is useful where steady illumination is preferable, but output and light spill should be kept modest.
- Use timed operation for predictable routines. Timers can suit regular evening arrivals, bin areas, or routes used at set times. They are less responsive than motion sensing but can avoid repeated false triggers.
- Include a manual override where practical. An override gives you a way to keep the light on temporarily when unloading a car, checking outside, or hosting visitors. Confirm exactly how it operates, as methods vary by fitting and wiring arrangement.
Sensor range claims are only a starting point. Height, angle, temperature, movement direction, nearby objects, and the detection settings have a major effect on real-world performance.
Check the proposed location and mounting point
The mounting position determines whether the light is useful, reliable, and reasonably easy to maintain. Decide it at the survey stage, not after the electrician has already run cable to an awkward spot.
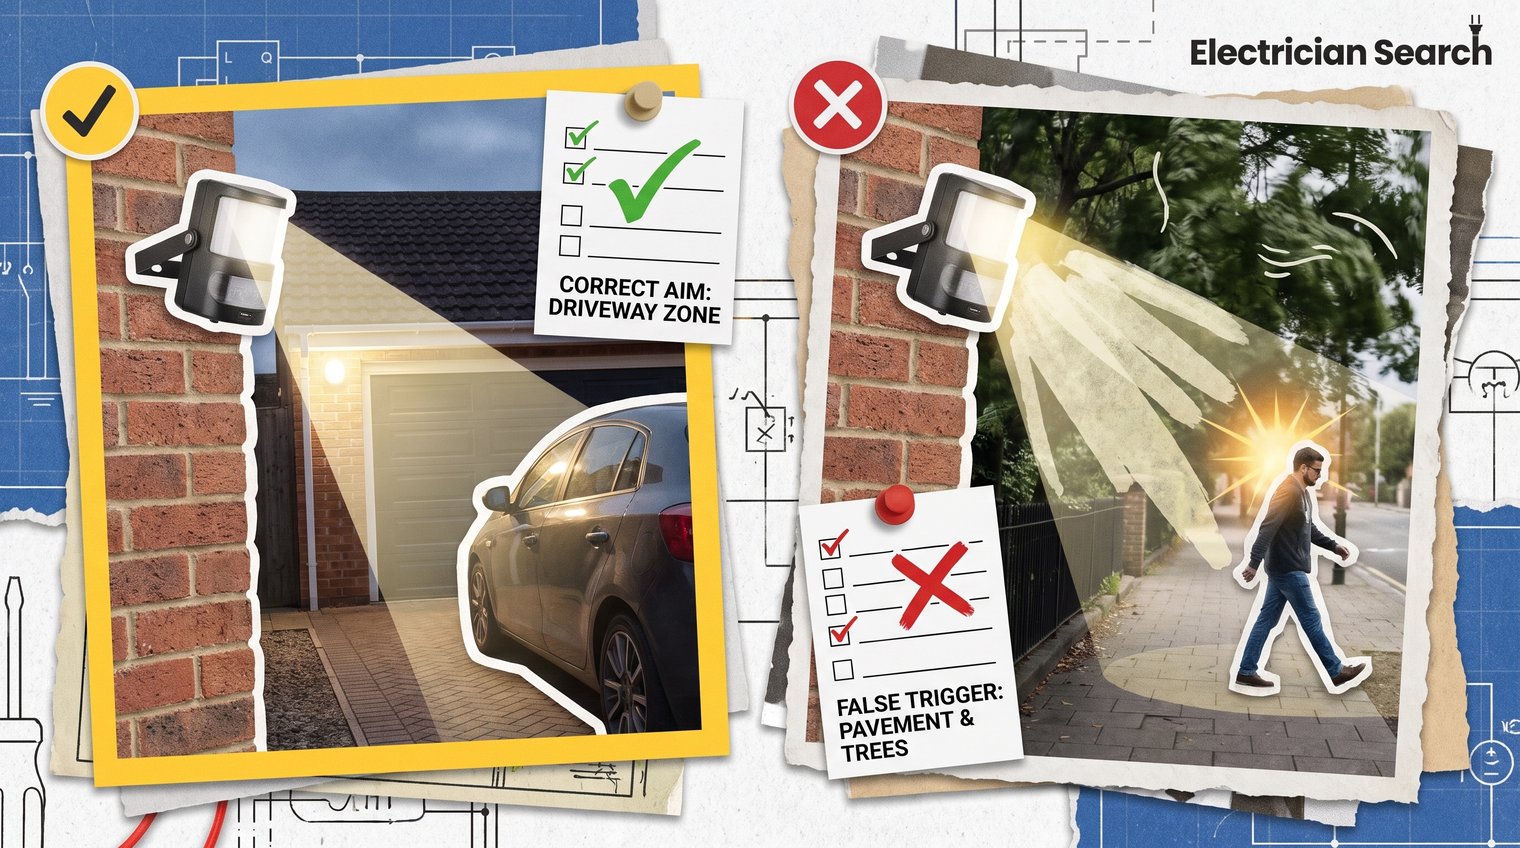
- Cover the target zone without blasting the wider area. Position the fitting so light falls on the path, entrance, vehicle area, or gate you identified. A beam that overshoots the target usually creates nuisance glare rather than extra security.
- Mount it high enough to resist tampering. A light within easy reach can be knocked, covered, or adjusted. It must still be accessible for cleaning, adjustment, and eventual replacement, potentially with suitable access equipment.
- Check the fixing surface. Brick, render, timber cladding, soffits, and external insulation systems require different fixings and care. A loose or poorly sealed mounting point can allow water in and leave the light insecure.
- Look for local obstacles and movement. Consider gutters, water run-off, opening doors, parked vehicles, climbing plants, wheelie bins, and branches that will grow into the detection zone. These details cause many avoidable call-backs.
- Discuss cable concealment honestly. A neat cable route may require drilling, lifting finishes, routing through a loft, or using surface containment. Difficult access and making good are legitimate cost drivers, so agree the approach before work begins.
Specify a fitting suited to UK outdoor conditions
Outdoor-rated LED security lights are generally the sensible choice because they use less energy and need less routine lamp replacement than older technologies. However, "LED security light" is not a complete specification. The fitting has to suit the exposure, the site, and the amount of light required.
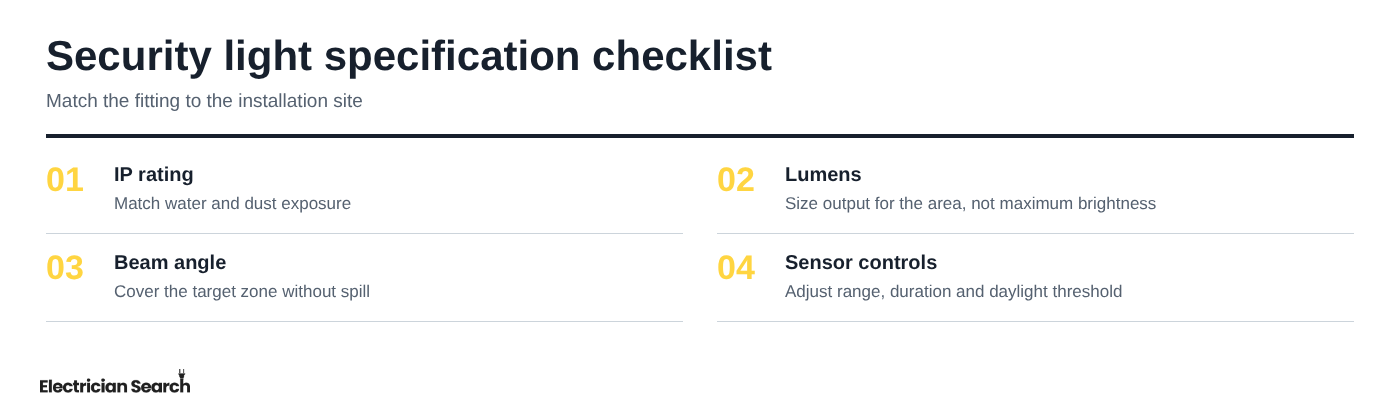
- Match the IP rating to the installation site. The IP rating indicates protection against solid objects and water. A fitting under a sheltered porch faces different conditions from one mounted on an exposed wall receiving wind-driven rain, so ask the electrician to assess the actual location.
- Choose a robust housing and suitable mounting arrangement. The unit should withstand normal outdoor conditions and remain securely fixed to its surface. Plastic, metal, seals, brackets, and cable entries all affect longevity.
- Size lumen output for the area, not maximum brightness. A compact doorway or narrow passage does not need the same output as a broad driveway. Excessive brightness wastes energy, causes glare, and may make shadows more pronounced beyond the lit patch.
- Use beam spread to control coverage. A wide beam can cover a larger driveway, while a narrower pattern may better suit a passage or gate. The aim is deliberate coverage, not indiscriminate spill.
- Consider colour temperature and sensor adjustment. Cooler white light can appear sharper, while warmer light is often more comfortable around homes and may reduce harshness. Adjustable detection range, on-time, and daylight threshold give the installer room to tune performance.
- Ask about integrated versus replaceable LED units. Integrated LEDs can be compact and efficient, but future repair options may differ from fittings that use replaceable lamps or modules. Consider warranty, expected use, and ease of replacement rather than assuming one style is always better.
Plan the electrical supply and safe cable route
The visible light is only the final part of the installation. The supply, protective devices, cable type, routing, connections, and earthing arrangement need to be appropriate for the work being undertaken.
- Let the electrician determine the supply arrangement. The light may be able to use an existing suitable circuit, or it may need a new supply. Do not direct an installer to take power from the nearest convenient point without an assessment of the circuit and protective measures.
- Confirm how cables will be protected outdoors. External runs can be damaged by weather, sunlight, gardening, doors, vehicles, and accidental impact. Cable selection and containment should reflect the route rather than being chosen solely for appearance.
- Check every external connection point. Junction boxes, glands, wall penetrations, and the fitting itself need suitable weatherproofing and secure cable entries. Water getting into a connection is not a cosmetic issue; it can cause faults and repeated tripping.
- Allow for testing after installation. Outdoor work should be tested once complete. A light switching on is not, by itself, evidence that the circuit, protective arrangements, and connections are satisfactory.
If the work may involve changes to the consumer unit or its protective devices, use this consumer unit replacement checklist to prepare questions for the electrician.
Questions to ask about compliance and certification
You do not need to become an expert in electrical regulations to ask for clear evidence of completed work. Focus on what the electrician will do and what you will receive.
- Ask what testing will be carried out. The electrician should explain that the installation will be checked and tested as appropriate, rather than simply fitted and powered up.
- Ask what paperwork you will receive. Keep any invoice, test results, certificate, and product documentation together. These records are useful for future fault finding, maintenance, insurance queries, and later alterations.
- Ask whether building-control notification is relevant. The answer depends on the scope and circumstances of the job. Your electrician should advise on the process that applies rather than leaving you to infer it from general online guidance.
Set up motion sensing without creating nuisance triggers
A motion sensor should detect the approach you care about, not every moving object within sight. Most complaints about security lights are adjustment problems, not evidence that the fitting itself is defective.
- Aim the sensor away from pavements and roads. Passing pedestrians, cyclists, cars, and headlights can activate an overly broad detection zone. Repositioning the sensor can be more effective than reducing its range to the lowest setting.
- Keep moving vegetation out of the detection area. Branches, tall grasses, washing lines, and loose hanging items can trigger PIR sensors, particularly in windy conditions. Trim vegetation and allow for seasonal growth.
- Avoid reflective and heat-related interference. Reflective surfaces, vents, heat sources, and nearby lighting can affect behaviour in some locations. Discuss any unusual site features during the survey.
- Consider regular pet routes. If pets repeatedly cross the coverage area, the sensor may need a different mounting position or operating approach. Do not assume an advertised pet setting will solve every layout problem.
- Adjust range, angle, on-time, and daylight threshold. Keep the run time long enough for safe arrival and entry, but not so long that the light remains on after every brief activation. Set the daylight threshold so the fitting does not activate unnecessarily in brighter conditions.
Test the setup after dark, then live with it for several days. Real traffic patterns, shadows, weather, and household routines often reveal changes that were not obvious during installation.
Protect neighbours, road users and the night environment
Security lighting should improve visibility on your property, not create a problem beyond it. A well-controlled installation is usually more effective because it draws attention to meaningful movement rather than lighting every nearby surface.
- Keep direct glare out of neighbouring windows. Check the light from the adjoining property line where possible, especially if bedrooms overlook the area. Tilt and shielding can make a substantial difference.
- Contain light within your boundary. Avoid throwing a broad beam over fences, across gardens, or onto neighbouring buildings. Aim downward and toward the specific route or feature that needs illumination.
- Do not dazzle drivers or pedestrians. A light close to a driveway entrance, public road, or pavement needs particularly careful direction. Glare can be distracting even if the fitting is technically on your own wall.
- Reduce impact with proportionate settings. Shielded fittings, lower output, shorter activation periods, suitable mounting heights, and warmer colour temperatures where appropriate can reduce spill while preserving useful visibility.
Ask for an itemised quote and understand typical cost drivers
There is no reliable one-price answer for security light installation. A straightforward replacement beside an existing sound supply is a different job from adding a new circuit to illuminate a detached garage or a long rear garden route.
For help comparing inclusions, use this electrician estimate checklist alongside the points below.
Ask for an itemised quote that identifies the main elements:
- Electrician labour. This may include survey time, installation, testing, setting up the controls, and travel. Complex work or restricted access will take longer.
- The fitting and accessories. Confirm whether the electrician supplies the security light, mounting hardware, junction boxes, cable, switches, and external containment, or whether you are providing any of them.
- Cable length and route complexity. Long routes, hidden runs, wall penetrations, loft access, external trunking, and difficult surface finishes all affect the price.
- Access equipment. High walls, eaves, awkward ground, conservatories, or obstructions may require ladders, towers, or other safe access arrangements.
- New circuit or consumer-unit work. If the existing supply is unsuitable, the electrical scope may expand beyond fitting a light. This should be clearly described rather than buried in a vague allowance.
- Testing, certification, and making good. Check whether these are included, along with sealing penetrations and any agreed repairs to disturbed finishes.
Compare like for like. One quote may include a quality fitting, external-grade cable, testing, and final sensor adjustment, while another only covers fixing a customer-supplied unit to the wall. The cheapest headline figure is not necessarily the lower-cost job once missing work is added.
Use an installation-day checklist
Installation day is the point to confirm the final practical details before holes are drilled and cables are fixed. A short conversation at the start can avoid an inconvenient light position for years.
Must-do items:
- Confirm the final light position and beam direction. Stand at the door, driveway, gate, or path and agree what the fitting needs to cover. Check that the planned angle avoids windows, the road, and the neighbour's property.
- Confirm access to the consumer unit and relevant rooms. Electrical work may require safe isolation and access to the supply route. Keep pets, children, vehicles, and stored items clear of the work area.
- Protect internal finishes around cable entry points. Where cables pass through walls, ask how the area will be protected and sealed. This is especially important near decorated walls, kitchens, or recently finished rooms.
- Agree switching and override expectations. Make sure everyone understands whether the light has a wall switch, how an override is activated, and what should happen after a power cut or when the sensor is switched off.
- Require testing and secure weatherproof terminations. Safe isolation, correct testing, firm fixings, and properly sealed outdoor connections are essential parts of the job, not optional extras.
Nice-to-have improvements:
- Add smart controls only if they solve a real need. App control, schedules, and linked lighting can be useful, but they add complexity. A correctly positioned conventional sensor light is often the more dependable choice for a straightforward entrance.
- Upgrade the appearance where it suits the property. Matching finishes, discreet cable containment, and coordinated external lights can improve kerb appeal, but should not take priority over safe supply arrangements and sensible coverage.
Before the electrician leaves, ask for a demonstration of motion detection, manual operation, override behaviour, timer settings, and the daylight threshold.
Test, document and maintain the finished installation
Do a proper check after dark. Daylight can hide glare, dead spots, unwanted spill, and sensor triggers that become obvious only at night.
- Inspect coverage from normal approach routes. Walk from the pavement, driveway, gate, and rear access as you normally would. Confirm that steps, locks, paths, and potential hazards are visible without dazzling you.
- Test automatic and manual operation. Trigger the sensor, use any override, and confirm the light turns off as expected. If a timer or dusk-to-dawn setting is fitted, check it at the appropriate time of day.
- Check fittings and cable entries visually. The unit should be secure, covers properly closed, and cable routes protected. Do not alter electrical connections yourself if something looks wrong.
- Retain all paperwork. Store invoices, product instructions, warranty details, and electrical documentation together. A photo of the finished cable route can also help if work is needed later.
For routine maintenance, clean the lens when dirt or cobwebs reduce output, trim vegetation around the sensor, and inspect the fitting periodically for cracks, loose fixings, water ingress, or damaged cable. Review sensor settings as seasons change: longer winter darkness, stronger summer daylight, and new plant growth can all affect performance.
Call an electrician if the circuit repeatedly trips, the light flickers, moisture appears inside the unit, a cable is damaged, the fitting overheats, or the sensor cannot be adjusted to operate reliably. Do not keep resetting a tripping circuit in the hope that the fault will disappear.
Compact security light installation checklist
- Choose a qualified electrician. Get a site-specific assessment, clear written scope, and confirmation of testing and relevant paperwork.
- Define the coverage area. Identify whether the priority is access, deterrence, CCTV support, or a combination of these.
- Select a suitable outdoor fitting. Match IP rating, light output, beam spread, housing, and controls to the exact location.
- Plan the supply and cable route. Let the electrician determine the appropriate circuit, protection, cable, external connections, and earthing arrangements.
- Control motion sensing. Aim the sensor away from roads, pavements, branches, pets, and other common false-trigger sources.
- Prevent glare and spill. Keep light out of neighbouring windows and away from drivers, pedestrians, and unnecessary areas.
- Compare itemised quotes. Check labour, fittings, cable route, access, testing, certification, and making good on a like-for-like basis.
- Test before sign-off. Confirm secure fixing, weatherproof terminations, automatic operation, override controls, and coverage after dark.
- Keep the records. Retain the invoice, instructions, warranties, and electrical paperwork, then maintain the fitting over time.
For a site-specific security-light quote, use ElectricianSearch to find nearby registered electrical professionals.