Bathroom electrical work is easy to get wrong because many decisions are made after the layout has already been tiled, boarded or painted. By then, moving a cable, fan duct or connection point can mean reopening finished surfaces and paying for work twice.
Use this bathroom electrical work checklist UK homeowners can take to an electrician, bathroom fitter or designer before work starts. It will help you lock in the practical decisions early, from shower zones and fan ducting to testing and certification.
Start with the bathroom plan, not the fittings
Do not start by buying lights, a heated towel rail or an illuminated mirror. Start with a scaled room layout that shows the finished positions of the bath, shower enclosure, basin, WC, doors, windows and every proposed electrical item.
- Give the electrician a final layout drawing. Mark lighting, switches, fan position, mirror, towel rail, underfloor heating thermostat, shower controls and any shaver supply unit. Even a simple measured sketch is better than deciding positions verbally on site.
- Confirm whether there will be a fixed shower. A shower over a bath, enclosed shower and level-access shower can affect the bathroom zones used to assess suitable electrical equipment.
- Show the finished room, not just the demolition layout. Moving a shower wall, changing a ceiling height or replacing a bath with a walk-in shower can change where equipment is allowed to go.
- Ask which decisions must be fixed before first fix. Cable routes, back boxes, fan ducts and supply points are much easier to install while walls and ceilings are open.
A good plan links each product to a real position in the finished bathroom. "A light over the shower" and "a light somewhere on the ceiling" are not the same instruction when zones, IP ratings and maintenance access are involved.
Confirm who is designing and carrying out the electrical work
Bathroom work is not just about fitting products. Someone needs to take responsibility for the electrical design, installation, inspection, testing and paperwork. Agree this before the first cable is run.
- Use a competent electrician with bathroom-installation experience. Bathroom environments require careful consideration of water exposure, equipment location, protective measures and coordination with other trades. The Electrician Near Me: 9-Point Checklist for Choosing a Local Pro can help when comparing local installers.
- Agree the scope in writing. The quote should identify what the electrician supplies and installs, which products you supply, and who is responsible for chasing walls, making good, boxing in ducts and fitting ventilation grilles. For budgeting context, see How Much Does It Cost to Hire an Electrician in the UK?
- Confirm compliance expectations before work begins. Electrical work should comply with the current edition of BS 7671 and relevant Building Regulations. The UK does not operate on a simple generic electrician "licence" model, so focus on competence, scope and the certification route for the work.
- Coordinate the trades. The plumber, tiler, builder, ventilation installer and electrician may all affect the final result. For example, the fan duct route needs space before a ceiling is boarded, while floor heating needs to be tested before tiles go down.

Check bathroom zones before choosing any electrical product
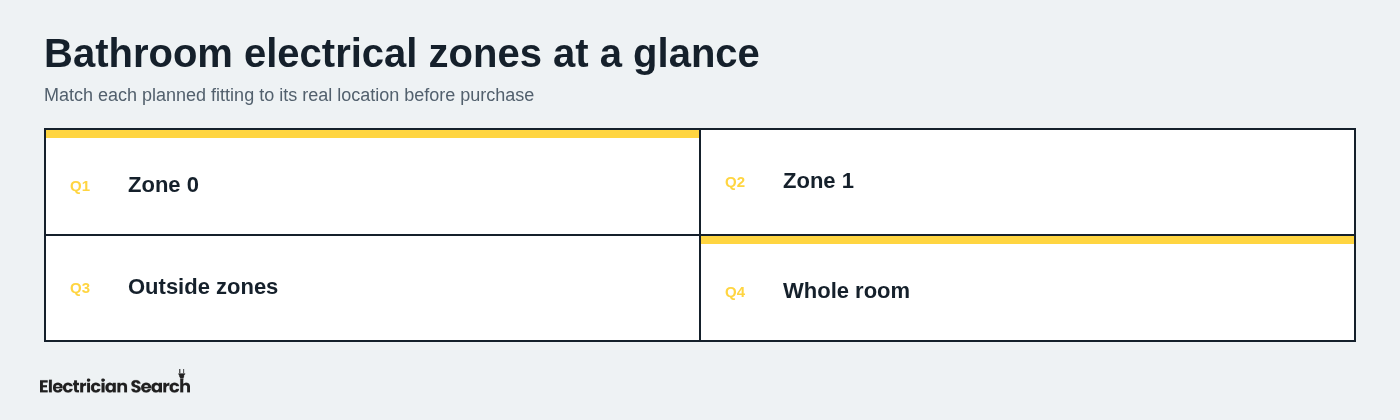
Bathroom zones are not an optional extra or a label to check after a product arrives. They are part of the design process. Identify Zone 0, Zone 1 and the area outside the zones from the final position of the bath or shower, then assess each intended fitting against that location.
The practical consequence is straightforward: the closer equipment is to water, the more restricted the choice becomes. Location can affect whether a product is suitable, the ingress protection it needs and whether it should be relocated entirely.
- Assess zones from the finished installation. Do not use an early sketch if the shower tray, screen, bath or ceiling design has changed.
- Check every fitting against its exact position. A product's IP rating is important, but it does not by itself approve a product for every bathroom location or installation method.
- Get a site-specific assessment for unusual rooms. Wet rooms, level-access showers, open shower areas and unusual screens can make boundaries less obvious. Ask the electrician to confirm the approach before products are ordered.
Zone 0: inside the bath or shower basin
Zone 0 is the highest-exposure location: the inside of the bath or shower basin itself. Do not plan ordinary lights, switches, sockets or towel rails in this space.
- Specify only specialist equipment where it is genuinely needed. Any equipment considered for Zone 0 must be selected and installed for that location, with appropriate ingress protection and a suitable installation method.
- Do not treat a splashproof-looking product as sufficient. The product instructions, the installation design and the zone all matter.
Zone 1: above the bath or shower
Zone 1 generally covers the area above the bath or shower. This is where recessed lights, shower-related fittings and some fan components are often proposed, but each item needs checking for its exact position.
- Verify the suitability of every proposed fitting. Check the stated IP protection, manufacturer instructions and intended use with the electrician before purchase.
- Allow for the ceiling and shower arrangement. Ceiling height and the presence of a fixed shower can affect how the zone is assessed. Product packaging is not a substitute for installation design.
- Plan access to hidden components. Drivers, transformers and fan connections must not become inaccessible problems above a finished ceiling.
Outside the zones: still a bathroom, still a higher-risk location
Outside the zones does not mean the room has become an ordinary dry room. Condensation, splash risk, steam, cable routes and manufacturer requirements still need attention.
- Assess the whole bathroom environment. A fitting may sit outside a defined zone but still be exposed to regular moisture or be poorly positioned for cleaning and maintenance.
- Resolve towel rail placement before buying. Bathroom zones for electric towel rails are a placement question, not something to guess from a product photo. Confirm the intended position, connection arrangement and suitability with the electrician.
- Keep manufacturer instructions with the product. Installation restrictions are part of the product specification and should be available to the installer.
Choose lighting, switches and controls that suit the room
A bathroom needs more than a single central light. Separate ambient lighting, task lighting around the mirror and any decorative or night lighting on the plan, then check the suitability of each fitting where it will actually sit.
- Mark each lighting purpose separately. Ceiling lights provide general illumination, while mirror lighting helps with shaving, make-up and grooming. Treat them as separate design choices rather than adding an extra fitting at the end.
- Check fitting location, IP suitability and driver access. Recessed LED lights and illuminated mirrors may have drivers or transformers that need a suitable location and future access.
- Decide where switching will happen. A conventional wall switch may be best outside the bathroom. Suitable pull cords or other compliant controls can be used inside where appropriate.
- Plan dimming and night lighting early. These are optional improvements, but they can affect cable requirements, switch types and control locations at first fix.
Do not assume an illuminated mirror has every feature you need. Some include lighting, some include a demister or shaver supply unit, and some require separate arrangements. Confirm the exact product specification before cables are installed.
Plan the extractor fan as a ventilation system, not an afterthought
A fan is only as effective as the route that carries moist air out of the building. Choosing a fan by its advertised airflow while ignoring duct length, bends and termination is a common renovation mistake.
- Agree the extraction route before ceilings are closed. Confirm the fan position, duct route, external termination, duct diameter and where any boxing or ceiling void will accommodate it.
- Specify backdraught prevention where needed. A suitable backdraught arrangement can help stop cold air returning through the duct when the fan is off.
- Choose the control method deliberately. Decide whether the fan runs with the light, has a timer overrun, uses humidity sensing or has separate control. Discuss realistic overrun and noise expectations rather than accepting a default setting.
- Provide cleaning and maintenance access. Fans and grilles collect dust. Make sure removable covers and accessible components remain reachable after the room is finished.
- Protect the duct route. Long, crushed, poorly supported or sharply bent ducting can significantly reduce performance. Coordinate this work with the builder or ventilation installer.
In a bathroom renovation, the duct route is often more important than the fan grille you can see. Deal with it while the ceiling is open.
Confirm circuits, RCD protection and isolation arrangements
Do not assume a new mirror, towel rail or shower can simply be added to an existing circuit. The electrician should assess the existing installation and design the work around the actual load and protective measures required.
- Ask for an assessment of the consumer unit and existing circuits. Capacity, circuit loading, earthing, bonding and required RCD protection should be considered before new equipment is connected.
- Confirm isolation arrangements. Equipment such as fans, showers, heating and towel rails may need suitable isolation for safe maintenance. Decide where isolation will be located and how it will be accessed.
- List all electrical loads before quoting. Include an electric shower, towel rail, underfloor heating, mirror demister, extractor fan, shaver supply unit, LED drivers and any other planned equipment.
- Do not rely on a blanket lights-versus-sockets rule. Circuit arrangements must be designed and verified for the specific installation. Whether an item is described as lighting or an outlet does not settle the question by itself.
High-load items deserve early attention. An electric shower and electric underfloor heating can change the electrical scope far more than a few LED downlights.
Place towel rails, underfloor heating and mirrors before first fix
These items are often selected late because they feel like finishing touches. Electrically, they are first-fix decisions: each needs a clear position, connection arrangement and a route for cables before walls and floors are finished.
- Confirm towel rail position and power requirements. Check the exact fixing location, product rating, connection point, isolation method and zone suitability before the rail is ordered.
- Coordinate underfloor heating before tiles are laid. Confirm the thermostat location, floor build-up, sensor position, electrical loading and testing process. The heating system should be checked at the required stages before it disappears below the finished floor.
- Plan illuminated mirror and cabinet connections. Confirm mounting height, cable entry point, shaver socket requirements and practical access to drivers or serviceable components.
- Keep future maintenance in mind. A concealed connection may look cleaner, but it should not make ordinary servicing needlessly destructive.
Decide whether a bathroom shaver socket is appropriate
A dedicated shaver supply unit is not the same thing as a normal 13A socket. This distinction matters because homeowners sometimes plan a standard socket for charging toothbrushes or using hair tools without considering whether that is appropriate for the room.
- Specify a proper shaver supply unit where that is the intended use. Confirm its proposed position against bathroom zones, product instructions and the electrician's design.
- Do not plan a conventional 13A socket by default. If you think you need one in the bathroom, seek specialist design advice rather than treating it as a routine fitting.
- Plan charging storage elsewhere if that solves the real problem. A cupboard, dressing area or nearby bedroom can be a more practical location for conventional charging and plug-in appliances.
Coordinate the electrical sequence with the bathroom renovation
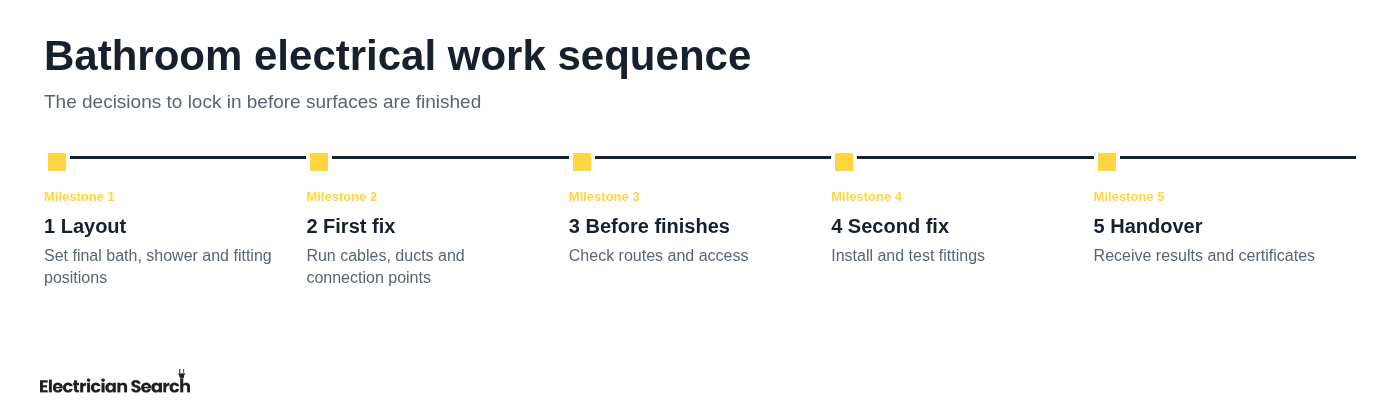
The recommended order of work for renovating a bathroom is not rigid, but electrical decisions must happen before finished surfaces hide the routes and connection points. Late changes are expensive because they can affect tiles, waterproofing, plaster and joinery.
- Finalise the layout and fittings. Lock in the bath, shower, basin, mirror, rail, fan and lighting positions before electrical design begins.
- Agree the electrical design and quotation. Make sure high-load items, ventilation and all supplied products are included rather than left as assumptions.
- Complete first fix. Run cables, install back boxes and connection points, and create the ventilation route while the structure is accessible.
- Check before surfaces are closed. Ask for a pre-close-up inspection before tiling, boxing-in, waterproofing or ceiling boarding hides cables, ducts and junctions.
- Carry out second fix and testing. Install the visible fittings once the room is ready, then inspect, test and complete the agreed handover documentation.
Changing a mirror position after first fix may seem minor, but it can leave a cable in the wrong place, create an unwanted repair or force a compromise on lighting. Treat the layout as fixed before the room is closed up.
Check testing, notification and certificates before final payment
Paperwork is not a formality to chase after the job. Ask what you will receive at the start, and confirm the handover requirements before the final payment is due.
- Ask what electrical certificate applies to the completed work. Depending on the work carried out, this may include an Electrical Installation Certificate or a Minor Electrical Installation Works Certificate. For more detail, see What Certificate Should an Electrician Provide After Work?
- Confirm the Building Regulations notification route in advance. Some work may require notification, and the correct route depends on the nature of the work and who carries it out. Establish this before work starts, not after the bathroom is finished.
- Keep all records with the property documents. Store certificates, schedules of test results, product instructions, warranties and any building-control paperwork together.
- Check that installed products match the agreed specification. Compare the final fittings, fan controls and heating arrangements with the quote and plan while changes can still be addressed.
Avoid the bathroom electrical mistakes that cause rework
Most avoidable problems come from treating the electrical design as a last-minute fitting exercise. A better result comes from resolving the layout, loads, zones and access arrangements before ordering products or closing walls.
- Do not buy fittings before zone and circuit checks. A fashionable light or rail can be unsuitable for its intended location, or require an electrical arrangement the existing installation cannot support.
- Do not undersize or poorly route the fan duct. A powerful fan cannot compensate for crushed ducting, unnecessary bends or a poor external termination.
- Do not hide inaccessible drivers or junctions. Future faults are much harder and more costly to investigate when components are buried above a sealed ceiling or behind tiled boxing.
- Do not forget heating and towel-rail loads. These may be modest individually, but they still need to be included in the electrical design and quote.
- Do not change the room layout after first fix without checking the consequences. A moved shower screen, cabinet or mirror can alter zones, cable positions and fitting suitability.
IP ratings, bathroom zones, circuit design and manufacturer instructions work together. No single label makes an unsuitable plan safe.
Your final bathroom electrical work checklist
Use this short list as a final pre-work check. The first group is essential; the second group covers worthwhile upgrades that are easiest to include during a full renovation.
- Final bathroom layout agreed. The finished positions of the bath, shower, basin, WC, doors and electrical fittings are shown on a plan.
- Bathroom zones checked. The electrician has assessed Zone 0, Zone 1 and the rest of the room from the final layout.
- Products approved for their location. Lights, fans, towel rails, mirrors and controls have been checked against their intended position and instructions.
- Lighting and controls planned. General, mirror and optional feature lighting are included, with sensible switching arrangements.
- Fan route designed. Fan type, duct run, external termination, control method and maintenance access are agreed.
- Circuits and RCD protection assessed. The existing installation, loads, earthing and required protective measures have been considered.
- High-load items specified. The electrician has details for the shower, heating, towel rail, demister and other equipment before quoting.
- First fix checked before surfaces close. Cables, ducts, connection points and access arrangements are reviewed before tiling or boarding.
- Testing and certificates confirmed. You know what documents will be issued and whether any Building Regulations notification is required.
Nice-to-have improvements include dimmable lighting, low-level night lighting, humidity-sensing extraction, a mirror demister and planned access for future maintenance. These are much simpler to include now than after the bathroom is complete.
If you are still choosing an installer, ElectricianSearch can help you find nearby registered electrical professionals to discuss this checklist before work begins.